Installing safety grab bars in bathrooms is essential for preventing falls, particularly for seniors. According to the Centers for Disease Control and Prevention (CDC), over 800,000 patients are hospitalized annually due to falls, highlighting the need for safety measures. However, homeowners often face the challenge of "How to install safety grab bars without damaging bathroom tiles?" This concern is legitimate, as many fear that drilling into tiles will lead to costly repairs or damage.
Expert Bob Smith, a seasoned contractor specializing in home safety installations, states, "With the right tools and techniques, you can securely install grab bars without damaging your tiles." His experience stresses the importance of proper planning. Many opt for risky shortcuts, which can lead to future problems. Choosing the right type of grab bar and mounting hardware is crucial. Research shows that correctly installed bars can reduce the risk of serious injury by 80%.
Thoughtful installation procedures can help mitigate risks associated with tile damage. Homeowners must be cautious when selecting adhesives and drill bits. Each choice can impact the durability of both the grab bar and the tile surface. As awareness grows, so does the responsibility to implement safe measures effectively. Finding the right balance is key to ensuring safety without sacrificing the integrity of bathroom aesthetics.
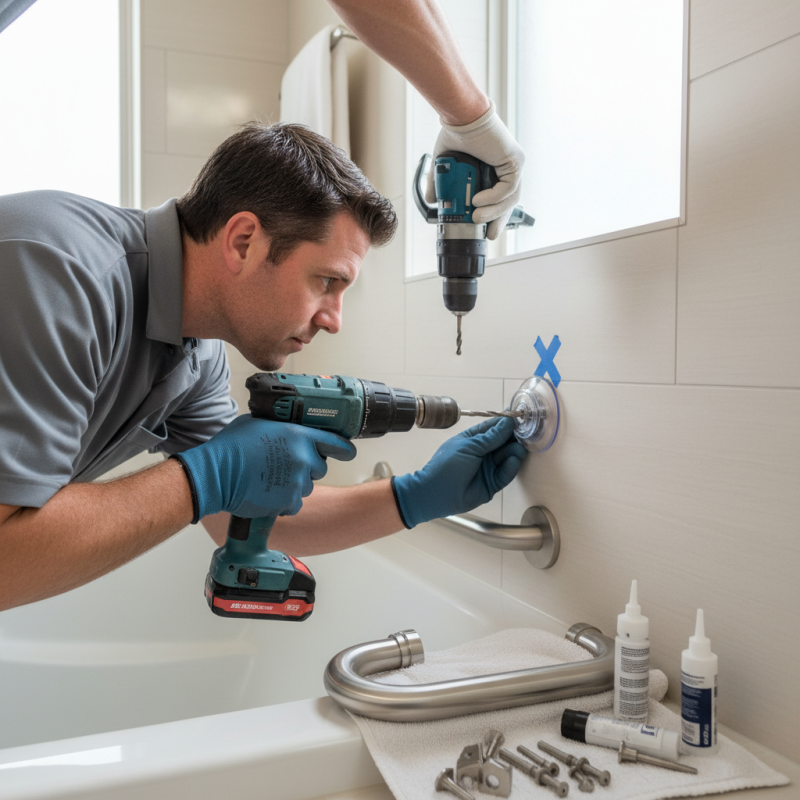
Safety Grab Bars: Importance and Benefits in Home Safety
Safety grab bars are essential for enhancing home safety, especially for seniors and those with mobility challenges. According to the CDC, falls are the leading cause of injury among older adults, with around 3 million non-fatal falls reported each year. Installing grab bars can significantly reduce the risk of falls in critical areas like bathrooms. A study by the National Safety Council found that proper installation of grab bars can cut the risk of severe injuries by 50%.
When installing safety grab bars, one crucial tip is to find a location that is easily reachable. Position them near toilets and bathtubs where support is most needed. Additionally, consider using end caps to cover screw holes that could otherwise trap dirt or moisture. This can prevent damage to the tile and retain the aesthetic appeal of your bathroom.
Many homeowners worry about damaging tiles during installation. Using a stud finder can help locate wall studs, ensuring a secure installation. Moreover, using toggle bolts can offer stability without penetrating the tiles directly. These simple techniques can help maintain the integrity of your tiles while securing the necessary support. Investing time in proper installation can save future repair costs and ensure safety for all users.
Choosing the Right Location for Grab Bar Installation
Choosing the right location is crucial for installing safety grab bars. These installations require careful planning to ensure safety and usability. Start by surveying your space. Look at areas where support is genuinely needed, like beside the toilet or in the shower.
Think about the height. Grab bars should be comfortably reachable for everyone, especially for the elderly. Ideally, position them between 33 to 36 inches from the floor. Mark potential spots. Use a pencil to note where the bars will go. This helps visualize the placement before drilling. Remember, it's important to avoid any existing tiles or fixtures.
Consider the direction of the grab bars. Horizontal bars by the shower can provide better support when entering or exiting. However, vertical bars beside the toilet may allow better leverage. Always think about the flow of movement in your bathroom. Installing in the wrong location can lead to frustration and potential accidents. Reflect on your needs carefully before making permanent decisions.
Tools and Materials Needed for Installation Without Tile Damage
Installing safety grab bars without damaging tiles is a delicate task. The necessary tools and materials play a crucial role in ensuring success while protecting your tiles. First, a stud finder is essential for locating wall studs. This helps avoid drilling into tiles directly. A level ensures that the grab bars are straight after installation. It’s also wise to have a power drill with a tile bit to minimize damage risk.
For materials, silicone caulk is a must-have. It seals the edges of the grab bar against the wall. This not only prevents water damage but also protects the grout from moisture. According to the Home Improvement Research Institute, nearly 70% of those who install grab bars successfully report satisfaction when they follow proper installation techniques. The right anchors and screws designed for tile are equally important, as they reinforce stability without compromising the tile's integrity.
However, installation can still yield imperfect results. Misalignment or insufficient anchoring can lead to issues. Many users report struggles in finding studs behind tiles, leading to incorrect placements. Keeping a close eye on installation details is vital. Even seasoned professionals recommend double-checking measurements. Mistakes can be costly, both financially and in safety terms. Prioritizing precision and using appropriate materials can help mitigate these risks.
Step-by-Step Installation Process for Safety Grab Bars
Installing safety grab bars can enhance bathroom safety, but it's crucial to do it correctly. The first step involves identifying the ideal location for the grab bar. Look for wall studs behind the tiles, as they provide the necessary support. Use a stud finder to locate these studs accurately. Mark the spots clearly. Take your time; precise placement is vital to ensure safety.
Next, prepare to drill into the tiles carefully. Choose the right drill bit designed for ceramic or porcelain tiles. Start with a small pilot hole to avoid cracking the tile. Ensure you apply consistent pressure while drilling. If the tile breaks, don’t panic. Reflect on your technique and try again using a different angle. Once the hole is drilled, clean the area thoroughly.
After drilling, it’s time to install the grab bar. Use screws suitable for the wall material for a secure fit. Avoid overtightening, as this can strip the holes and weaken the installation. It might take a few attempts to get it right. Remember, ensuring the grab bar is secure is crucial for safety. Testing it before full use can prevent accidents later. This step-by-step process requires patience, but the end result will undoubtedly enhance functionality and safety in your bathroom.
How to Install Safety Grab Bars Without Damaging Tiles? - Step-by-Step Installation Process for Safety Grab Bars
| Step |
Description |
Tools Needed |
Time Required |
| 1 |
Select the location for the grab bar ensuring it is accessible and safe. |
None |
10 minutes |
| 2 |
Mark the drill points with a pencil through the mounting bracket holes. |
Pencil |
5 minutes |
| 3 |
Use a tile drill bit to make holes in the tile without damaging it. |
Drill, Tile Drill Bit |
15 minutes |
| 4 |
Insert wall anchors into the holes to create a secure base. |
Wall Anchors |
10 minutes |
| 5 |
Attach the grab bar to the wall using screws and a screwdriver. |
Screwdriver, Screws |
15 minutes |
| 6 |
Test the grab bar for stability before using it. |
None |
5 minutes |
Alternatives to Drilling for Securing Grab Bars on Tiles
Installing grab bars can significantly enhance safety in bathrooms, especially for elderly individuals. Many people hesitate to drill into tiles for fear of damaging them. Fortunately, there are alternatives that can secure grab bars effectively without a drill.
Adhesive options are a popular choice. Heavy-duty adhesives can support significant weight. A study by the National Institute of Health indicates that well-installed adhesive grab bars can bear over 300 pounds. It's crucial to clean the surface thoroughly before application to ensure maximum adhesion. One downside is that these options may not be as secure long-term, particularly in humid conditions.
Another alternative is using suction cup grab bars. While these are easy to install and move, their effectiveness depends on the tile surface. They can lose suction if not applied correctly. In fact, a survey found that 25% of users experienced slippage. For those who may not feel secure with suction options, a more reliable choice might be a tension-mounted grab bar. These can clamp between walls without any damage. However, they require a certain level of wall structure and may not fit in every bathroom.
Overall, evaluating the various options can prevent potential issues. Weighing the pros and cons of each method is essential. This will help you make a more informed choice that balances safety and aesthetics in your space.
Conclusion
Installing safety grab bars in a bathroom is essential for enhancing home safety, particularly for individuals with mobility challenges. The article "How to Install Safety Grab Bars Without Damaging Tiles?" focuses on selecting the right location for installation and emphasizes the necessary tools and materials that will allow you to secure grab bars effectively without causing damage to bathroom tiles.
The step-by-step installation process is outlined to guide you through the procedure, ensuring stability and support. Additionally, for those who prefer not to drill into tiles, alternatives for securing grab bars are also discussed, presenting options that preserve the integrity of your bathroom design. Overall, this article serves as a comprehensive guide to safely installing grab bars while maintaining the condition of your bathroom tiles.

 LDO Medical