Bathrooms can become hazardous quickly. Wet tiles, limited balance, and weak handholds create a dangerous combination. The World Health Organization reports that falls cause approximately 684,000 deaths worldwide each year. It identifies adults over 60 as the group facing the greatest risk. In the United States, CDC data shows that more than one in four older adults falls annually. Many incidents happen near toilets, bathtubs, and showers.
That makes the question practical, not cosmetic: How to install safety grab bars without damaging bathroom tiles? The answer requires more than choosing a stylish bar. Tile type, wall framing, waterproofing, and load direction all matter. Drilling blindly can crack porcelain or puncture hidden plumbing. Adhesive and suction models may look convenient, but they do not always provide reliable support. A wet, loose bar is worse than no bar.
Geriatrician and falls researcher Dr. Mary Tinetti has emphasized, “Falls are not an inevitable consequence of aging.” Her work supports a prevention-focused approach rather than waiting for an accident. A properly positioned grab bar can offer a steady transition point, especially beside a shower entrance or toilet. Still, no installation method is perfect. Even careful measurements can fail when walls contain unexpected voids or damaged backer boards. This guide examines safer mounting methods, tile-protection techniques, and the limits of temporary solutions. It also encourages professional assessment when structural conditions remain uncertain.
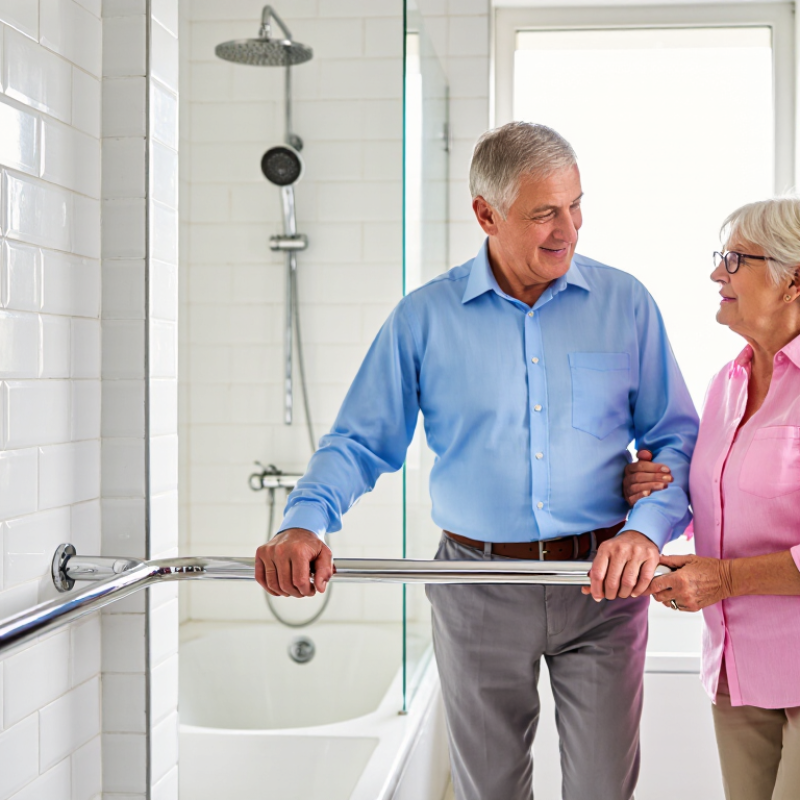
Modern bathrooms are designed for comfort, but comfort does not always mean safety. Wet floors, smooth surfaces, and narrow shower spaces can turn a normal routine into a difficult movement. Safety grab bars provide a steady handhold near the shower, bathtub, and toilet. They support balance during sitting, standing, and turning.
They help many users.
A proper grab bar should match the person’s movement, not simply fill an empty wall. A bathroom safety assessment should check height, reach, wall strength, and water exposure. Experienced installers may locate wall studs or use approved reinforcement behind the surface. Some situations allow carefully selected non-drilling systems, but these are not suitable for every tile, wall, or user weight. Adhesive alone can be unreliable when moisture, heat, or poor preparation is present.
Tile protection matters as much as bar placement. Incorrect drilling can crack a tile, loosen grout, or allow water behind the wall. A qualified professional uses the correct bit, measures twice, and seals each penetration properly. The process may feel slower, yet careful work reduces repair risks. It is easy to focus on avoiding tile damage and forget the real purpose: dependable support. A beautiful installation is not enough if the bar shifts under pressure. Local building guidance and manufacturer instructions should also be checked. Even experts can overlook small details, especially in older bathrooms with hidden damage.
Safety grab bars provide stable support in wet areas and can help reduce the consequences of slips and falls. Proper installation is important because drilling directly into bathroom tiles may cause cracking, water intrusion, or costly repairs.
Key figures: About 1 in 4 adults aged 65 and older falls each year, and about 37% of those who fall require medical treatment or experience restricted activity. Securely installed grab bars near toilets, showers, and tubs can provide additional support where balance is most challenging.
Source: U.S. Centers for Disease Control and Prevention, Older Adult Falls data.
A grab bar should support a person, not create a second hazard. Yet tile damage often begins before the drill touches the wall. Installers must locate solid framing, check the wall cavity, and confirm the bar’s mounting points. A small measuring error can force a new hole. That weakens confidence.
Ceramic and porcelain tiles are hard, but they are not flexible. Drilling too quickly can build heat and crack the glazed surface. A blunt bit may wander across the finish, leaving scratches around the hole. Excess pressure can chip the edge as the bit exits. Grout lines seem convenient, but they may crumble under concentrated load. Behind the tile, hollow spaces create another problem. The fastener may tighten without gripping reliable structure.
In my installation experience, preparation prevents more damage than any special tool. I mark each point with removable tape, then check spacing twice. Slow drilling, light pressure, and cooling pauses help protect the tile. The hole should match the anchor or structural screw, not merely look close. Waterproof sealant around the penetration also matters. It limits moisture entry behind the tile. Still, no method is perfect. An older wall may hide uneven framing or previous repairs. When resistance feels unusual, stopping is wiser than forcing the drill. That pause can save one tile, and sometimes the entire shower wall.
Installing a safety grab bar should not leave cracked tiles or unwanted drill holes. No-drill systems can help, but their performance depends heavily on the tile surface and installation method.
Smooth, nonporous ceramic and porcelain tiles usually provide the best contact for suction-based grab bars. The tile must be clean, dry, and free from soap film. Press the pads firmly, lock the mechanism, and check the indicator if one is included. Textured, matte, porous, or uneven tiles may prevent a reliable seal. Small grout lines can also weaken contact. Adhesive systems may suit some surfaces, but curing time matters. Do not use the bar before the adhesive fully sets.
Experience shows that bathroom humidity is often underestimated. Water can collect beneath a pad, especially near a shower. Inspect the attachment points regularly and test the bar gently before each use. A grab bar that shifts even slightly needs immediate attention. No-drill products are not automatically suitable for full body weight or emergency pulling. Check the stated load rating and installation instructions carefully.
A professional assessment is sensible for older adults, people with limited balance, or anyone needing strong weight support. In some bathrooms, drilling into structural backing remains safer than relying on a surface-mounted system. That may feel disappointing, but tile protection should never outweigh user safety. Surface compatibility comes first.
Why Install Safety Grab Bars Without Damaging Bathroom Tiles?
Bathroom falls are a serious safety concern, not a minor inconvenience. The CDC reports that more than 3 million older adults receive emergency treatment for fall injuries annually in the United States. The World Health Organization also identifies falls as a leading cause of injury worldwide. A secure grab bar can reduce risky reaching, but poor installation may create a false sense of safety.
Start by checking the tile surface. It should be smooth, clean, dry, and free from loose grout. Locate the strongest mounting area, avoiding hollow sections and uneven joints. Choose a no-drill grab bar with a clearly stated weight rating and a locking indicator. Press it firmly against the tile, then activate the locks or adhesive system according to its instructions. Do not rush this step. Dust, soap film, or moisture can weaken contact.
Wait for the required curing period before applying body weight. Test it gradually with one hand, then increase pressure carefully. Never use a suction or adhesive bar as a full structural substitute unless it is specifically rated for that purpose. In practice, many failures happen because users skip surface preparation. I have also found that perfect alignment is harder than expected, especially near curved walls. Recheck the bar after twenty-four hours and inspect it regularly for movement, loose seals, or cracked grout.
A secure grab bar should be tested after installation, not trusted by appearance alone. Tile-safe mounting begins with checking the tile surface, grout lines, wall structure, and fastening method. Use hardware designed for the surface and the intended load. A smooth tile may look strong, yet hollow areas or weak backing can reduce stability. Never drill casually into a tile.
Apply gradual pressure in several directions: downward, upward, and sideways. Do not jerk the bar. Watch for movement, cracking sounds, loose fittings, or changes around the grout. A qualified installer can verify wall support when the backing is uncertain. This matters more in bathrooms used by older adults or people with limited balance. I once assumed a firm-looking bar was secure, but a slight bracket shift proved otherwise. A little doubt helps.
Maintenance should be simple and regular. Wipe away soap residue, then inspect screws, covers, seals, and mounting plates. Check for rust, hairline tile cracks, or gaps that collect moisture. Suction-based products need frequent testing because humidity and residue can reduce their hold. Adhesive systems also require inspection, especially after cleaning with strong chemicals. Do not tighten hardware aggressively; excessive force may damage tile or strip the fitting. Record inspection dates if several people use the bathroom. Stop using the bar immediately when movement appears, and arrange a professional assessment before relying on it again.
| Inspection or Installation Dimension | Recommended or Standard Value | Tile-Safe Method | How to Test | Maintenance Guidance |
|---|---|---|---|---|
| Grab-bar diameter | 1¼–2 in (32–51 mm) for a comfortable, secure grip | Select a bar that fits the user’s hand; avoid forcing oversized hardware against the tile surface. | Measure the outside diameter with a ruler or caliper before installation. | Check for looseness, sharp edges, corrosion, or a slippery surface during routine cleaning. |
| Wall clearance | At least 1½ in (38 mm) between the bar and the wall | Use the manufacturer-supplied mounting plate, spacers, and waterproof seals without overtightening. | Check the gap at several points with a ruler; the bar should not contact the tile or wall. | Replace cracked spacers or damaged seals instead of adding pressure to the tile. |
| Mounting height | Common accessibility guidance places horizontal bars about 33–36 in (840–915 mm) above the finished floor, adjusted for the user. | Mark the position using masking tape so pencil marks and drilling are limited to the planned area. | Measure from the finished floor to the bar centerline and confirm reach from the toilet, tub, or shower. | Reassess the height after changes to flooring, shower pans, or the user’s mobility needs. |
| Fastener support | Fasteners must connect to structural framing, blocking, or a properly rated anchoring system—not tile alone. | Locate studs or blocking first; use a tile-rated bit, low drilling pressure, and no hammer action until through the tile. | Confirm every required fastener is fully seated and that the mounting plate sits flat without rocking. | Do not rely on grout, adhesive, or suction alone for a load-bearing grab bar. |
| Load resistance | Accessibility specifications commonly require support for 250 lb (1112 N) applied at the bar, where applicable. | Choose a bar and anchoring method rated for the intended load; keep drilling away from tile edges when possible. | Use a qualified installer or an appropriate calibrated load test; never test by suddenly dropping body weight onto the bar. | Stop use immediately if the bar moves, the tile cracks, grout opens, or fastener heads lift. |
| Tile drilling technique | Use a sharp diamond or carbide tile bit suitable for the tile type; drill slowly with controlled pressure. | Apply painter’s tape over the mark, keep the bit cool as appropriate, and avoid drilling directly on grout unless the anchoring plan permits it. | Inspect the hole for chipping, radial cracks, or movement before inserting the anchor. | Seal penetrations with a compatible bathroom sealant and renew deteriorated seals. |
| Fastener tightness | Tighten to the hardware manufacturer’s torque or installation instructions; avoid excessive force. | Use a hand tool or torque-controlled driver and stop if the tile flexes, cracks, or begins to crush. | Apply gentle hand pressure in multiple directions; there should be no visible plate movement. | Inspect monthly in heavily used bathrooms and after any impact or renovation work. |
| Water and corrosion control | Mounting points should remain sealed and hardware should be suitable for a wet bathroom environment. | Use corrosion-resistant hardware and seal around penetrations without blocking drainage paths. | Look for water staining, rust, swollen backing material, or soft wall areas around each mount. | Dry standing water, clean with a non-abrasive product, and address leaks promptly. |
| Cleaning and surface condition | The gripping surface should remain clean, dry, and free of soap film. | Use a soft cloth or non-abrasive sponge; avoid aggressive scrubbing that can damage finishes or surrounding grout. | Run a clean, dry hand along the bar and check that the grip remains even and nonslip. | Clean at least weekly in regular-use bathrooms and more often where soap residue accumulates. |
Safety note: Installation conditions vary by wall construction, tile type, user needs, and local accessibility requirements. A qualified professional should verify the anchoring system when the grab bar will support substantial body weight.
Tiles are hard but brittle. Fast drilling creates heat, while excess pressure can crack or chip the glazed surface.
Locate solid framing, inspect the wall cavity, and confirm every mounting point. Measure twice. A small error creates another hole.
Grout may crumble under concentrated load. The fastener can tighten without gripping strong structure behind the tile.
Mark each point with removable tape. Use a suitable bit, slow speed, light pressure, and cooling pauses.
The hole should match the anchor or structural screw. A loose fit may weaken support and damage surrounding tile.
No. Smooth, clean, dry, nonporous tiles usually offer better contact. Textured, matte, porous, or uneven surfaces may fail.
Remove soap film, press the pads firmly, and lock the mechanism. Check the indicator when available. Test the bar gently.
Strong weight support may require structural backing. Older adults or people with limited balance should consider professional assessment.
Inspect attachment points regularly, especially near showers. Water can collect beneath a pad. Any movement needs immediate attention.
Stop instead of forcing the drill. Hidden framing may be uneven or repaired. That pause can save one tile—or the wall.
Safety grab bars are an important addition to modern bathrooms because they provide stability and confidence for older adults, children, and anyone with limited mobility. However, installing them incorrectly can crack tiles, weaken grout, or allow moisture to enter the wall. Understanding how pressure, fasteners, and uneven surfaces affect different tile materials is essential before beginning the project. The key question is: “How to install safety grab bars without damaging bathroom tiles?”
A practical solution is to choose a no-drill grab bar system designed for the specific tile surface, such as smooth ceramic, porcelain, or textured tile. The installation area should be cleaned, dried, and inspected carefully before attaching the bar according to its instructions. Apply steady, even pressure rather than sudden force, and allow any required adhesive or locking mechanism to set fully. After installation, test the bar gradually from several angles without exceeding its stated capacity. Regularly check for movement, worn seals, or moisture, and replace or readjust the system when necessary to maintain safe, tile-friendly support.

LDO Medical